The Inca Trail – Everything You Need to Know

Start of the Inca Trail with Peru TreksThe Inca Trail was by far the best travel experience I have had to date.  It is everything you think it is and more.  Everything about the experience was amazing, the views (my site logo is just one of the pics from the trek), the group we were with, and the trekking company itself.

If you have any sort of shred of interest in going, the Inca Trail should be on the top of just about anyone’s bucket list.  I saw people of all ages and walks of life on the trail so there is little excuse for anyone not being able to make it.  You do need to be in relatively good shape, but porters will carry the tents, cooking equipment etc leaving you with only your personal gear with the option to hire a porter for that too!

Which Inca Trail Tour Company

logo-perutreks_smallThere are several tour companies based out of Cuzco that gives tours like this. There are usually different tours to choose from (Jungle hikes, Mountain hikes, etc.), but the most popular (and I assume the best) is the Inca Trail trek that ends in Machu Picchu. We talked to people who waited until the last second to book something only to find all the Inca Trail treks were full.  The other ones did sound fun (and people returning said they had a blast) but ill leave those for next time (the jungle trek caught me eye in particular).

We ended up going with the tour company “Peru Treks,” specifically the Inca Trail 4 Day Trek.  It was a matter of comparing different trekking companies, reading reviews, what you get for your money and who seemed to be the most reliable. Everything held up for Peru Treks and were had no regrets. Their website also has a lot of good info on Cuzco and the area in general, as well as hotels and day activities. The website and description of what we booked was very accurate, so their website is a good resource.

The total price, per person, for the Inca trail Trek was around $500 USD (As of July 2014 it seems to be $595). You pay a partial deposit when you book it (like $220) and the rest upon arriving in Cuzco. 500 dollars may sound like a lot at first, but I thought it was very reasonable considering you get private coach bus ride to the start of the hike, the 4 day guided hike, food/ drinks for 4 days, basically 3 nights of lodging (of course its camping in tents, but staying at hotels would be much more money), porters to carry the heavy stuff, entrance into Machu Picchu, and a combo bus and train ride to get you back to Cuzco.

The guides take a lot of the headache out of things for you too, since they know what they are doing. Basically there are a lot of costs that would add up if they weren’t included, so its a pretty good deal, and having a person explaining the significance of everything was just an added bonus.

Read their website in full to answer any questions, especially the itinerary and FAQ.  Book early (as in at least 4~6 months in advance) – dates fill up months in advance, so it’s not really a spur of the moment thing while you are there.

What to Bring
Packs on the Inca Trail

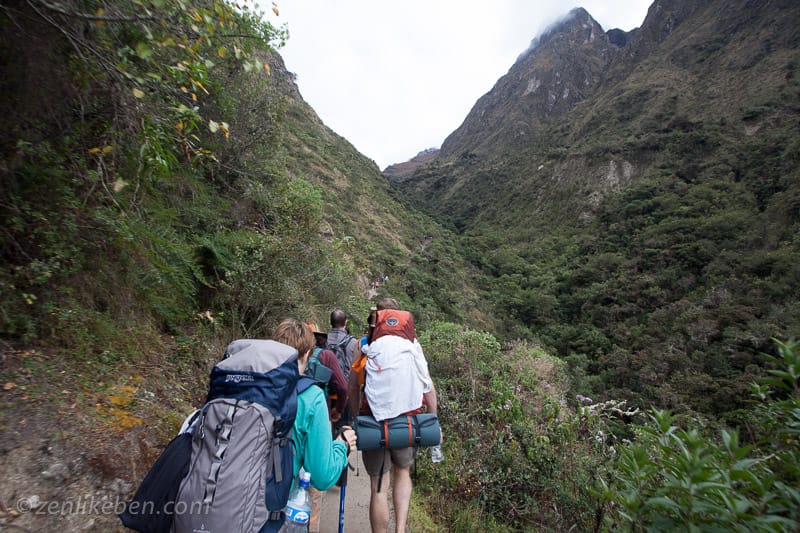
Packs from our group on the Inca Trail

Packing for the Inca Trail can be a little tricky. For starters, look at my guide for packing for international travel and add things from there.  While it’s not necessary, a lightweight and small internal frame pack would be a great purchase.  A person in our group got by with a drawstring pack and some shopping bags, but I would not recommend it.  He seemed to struggle with his contraption on some of the steep stair climbs.

Something on the smaller side, 35~45 liters is ideal.  Purchasing a backpack for this trip has proven beneficial to me – I used it on my most recent trip to Europe and will be using it again for my trip to Japan.  I bought an Osprey pack, but anything will do.  Go to your local outdoors store and try a few on and see what you like best.

The last thing you want to do is bring to much on the trail itself.  Unless you are hiring an extra porter, the weight can be a struggle on day 2 during the accent to Dead Woman’s pass.   Make sure you bring layers, the mornings start cold and then get warmer as the day goes on, so being able to shed layers is beneficial.  It’s very sunny out at times so you will want light colored fabric to cover yourself with to prevent burns.  To help prevent burns wearing a big dorky safari type hat or over-sized bandana and visor system to cover your ears and neck is also helpful.   A headlamp is also a must have item for searching for the bathroom late at night.  A water bladder helped me tremendously too – staying hydrated is key!

Fitness for the Inca Trail

While you don’t have to be a marathon runner, you should be in decent physical shape before undertaking any trip to a high altitude area.  Don’t let this discourage you though, we saw people of all ages and walks of life on the trail.  Undertake an exercise program, and get a few good hikes in long before your trip (at least a few of these with a weighted pack).  You can always hire a porter if you feel the need, but you’ll be surprised what you can accomplish if you have a goal in mind.

The hardest part for me was not going up but coming down.  The trail is rocky and I have weak knees – so renting trekking poles probably saved my life.  A good, cheap add on I’d recommend and saves you the hassle of packing them yourself.

How We Got to the Inca Trail
Steep hill at the steps of our hostel in Cusco.

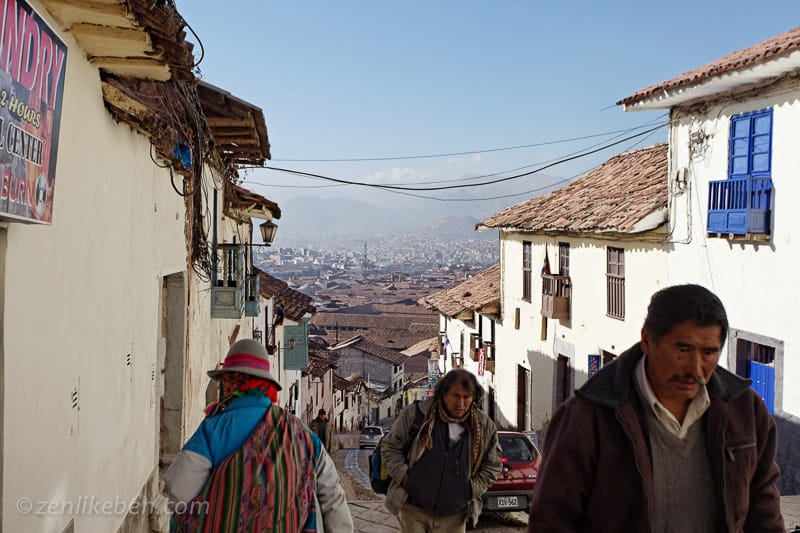
Steep hill at the steps of our hostel in Cusco.

The closest city to the Inca Trail is Cusco.  Ideally you will want a few days before the trek to acclimate to the altitude and a day or two after the trek to rest.  There is a lot of stuff to do in Cusco so your downtime can be spent doing things.  Erik and I did some day hikes to better help us acclimate.

Flying to Cusco is relatively easy.  We flew into Lima and then stayed overnight in the airport to catch a early morning flight into Cusco.  I was a bit worried about sleeping in an airport in Peru, but it turned out to be a non-issue with dozens of travelers doing the same thing, we felt completely safe.  Don’t plan on sleeping on the flight from Lima to Cuzco.  Its only a few hours and you get to fly over the Andes mountains during sunrise, a view I didn’t want to miss.

I hope you find this guide useful.  As I mentioned this trip, while short (We were in Peru for only 10 days), was one of the best trips I have ever taken.  In the coming days I’ll share more about my trip to Peru!
 

Posted in Travel | Tagged , | Leave a comment

Photo of the Week – Vilcanota Mountain Range

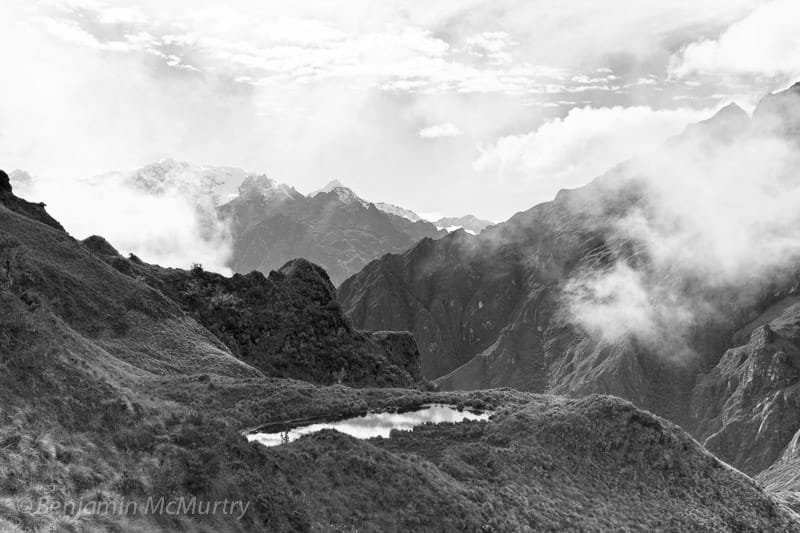
Vilcanota Mountains - Inca Trail

5D Mark II – 35MM ISO 100 F/8.0

I was hiking along the Inca Trail when I turned and saw the snow covered peaks of the Vilcanota mountain range is in the distance.  I snapped this photo and didn’t think twice about it until I got home and realized how breathtaking it looks in B&W. This photo hangs in my bedroom – the detail the 5D is able to capture really shines through in this photo!

Posted in Photography, Travel | Tagged | Leave a comment

Buying a Used X100 – How to Avoid Sticky Aperture Blade

Avoiding Sticky Aperture Blade on the X100As I mentioned earlier, the X100 is the best travel camera I have ever owned. I bought mine used and got a great deal on it. However in doing my research prior to buying, I came across the Sticky Aperture Blade (SAB) problem, a condition that a few of early model X100’s had.

While Fuji would fix the issue, they required proof of purchase in order to perform the repair – an issue for those, like myself, buying their camera used. What is it and how can you avoid it? Follow this guide!

What is Sticky Aperture Blade

SAB is a condition where aperture blades lock up and freeze, leading to overexposure or underexposure of images. This happens when shifting to one aperture stop after taking a picture in a prior setting.

How Can I Avoid Buying a Used X100 with Sticky Aperture Blade?

SAB is a tricky animal to avoid. Some early models exhibited it and some did not.  Fuji also recognized and fixed the problem in later models.

Has the owner Experienced this Before?

If buying used I’d ask the owner if they’ve had the problem before and if so was it fixed?  If they haven’t I’d ask them to provide you a proof of purchase (email etc) in case the issue arises later on.

With the proof of purchase you should not have any problems having this fixed under warranty from Fuji.  Some users have reported sending in their Amazon Market Place receipt from buying it used on Amazon as enough proof.

Serial Numbers to Avoid for Sticky Aperture Blade

Avoid Sticky Aperture - Look at the SerialAnother way to avoid SAB is to look at the serial number (or request it from the owner) before buying.  While not a definitive proof, it’s a good guideline to follow.  Look at the first two digits of the serial number, they relate to what quarter the camera was made in.

The problems seem to be with 12A, 13A, and a very few 14A series cameras.  None, according to a Fuji Service Technician, seem to have been reported with SAB with S/N 21A or later.  While there are 12, 13 etc cameras that do not have issues (supposedly only 2% of the affected serial numbers have the problem, so it’s not wide-spread), it’s still not worth the risk (Unless of course you get a proof of purchase) if you are buying used.

What Does This All Mean?

Nothing really, Sticky Aperture Blade only affects a small portion of X100’s and it’s easy to avoid.  So in short here is how to avoid buying a used Fuji X100 with Sticky Aperture Blade:

  • Ask the owner if it the camera has experienced it before and if so, has it been fixed?
    • If not, can you provide an original receipt or copy of one?
  • What’s the serial number?  SAB was fixed for 21A X100s and later

Hopefully you too well find my guide useful and purchase an excellent travel camera.  I wouldn’t leave home without it.

Posted in Photography | 4 Comments

Fuji X100 – The Perfect Travel Camera

Fuji X100I take my Fuji X100 everywhere.  It is by far the best travel camera I have ever own.  Excelling at both street scenes and landscape, the X100 is at the top of my packing list before any trip.

Easy to swing over the shoulder, I sometimes forget it’s there!  The vintage look just further adds to this camera, thieves think you have a old film camera and won’t bother and potential photo subjects think you’re an art student and won’t care!  It really is the best of both worlds.

Below is just a quick sample of some of the pics I’ve taken with this camera.  It excels at low light and the fixed lens is sharp as a razor.

While the camera, is not without it’s quirks, once you get used to them you’ll be quickly taking photos like a pro.  I love the quick access to full manual control and the physical buttons for shutter speed, exposure, and aperture.

I bought the Fuji X100 over the X100s simply because I was able to get the X100 for such a deal – less then $600 used.  Scour Ebay, Amazon marketplace, or photography forums and you might be able to come up with the same deal.  For those buying used, look into the sticky aperture problem.  Basically only buy the camera if its either been sent in and fixed by Fuji or in a serial number batch where it didn’t have the problem to begin with.

With the most recent 2.0 software update (Don’t get me started how awesome it is Fuji is still updating this camera), I haven’t felt the need to get the X100s.  Fuji increased the focus ability and start-up times dramatically, two of my pet peeves with the camera.

For starters I’d recommend the Lensmate Thumbrest (also available in black) – it allows you to more easily hold the camera with one hand.  The included charger is a bit of a pain to pack so I bought a cheap-o one on Amazon that included some batteries and it hasn’t failed me (yet).

I love my Fuji X100.  It’s far lighter then my SLR, takes much, much better pictures then my old Canon S95, and is a blast to use.  I highly recommended it for anyone traveling abroad.

Posted in Photography, Travel | Leave a comment

How I Made Preferred and Collected 180,000 Miles for Under $1500

USAirways at DCA TermonalA while ago I was young and more broke I was dating a girl that was going away to graduate school on the other side of the country.  Being in graduate school myself at the time I didn’t have a ton of cash to spend on back-and-forth travel.  I needed to figure out a crafty way to fly across the country for a reasonable price.

While there was no silver bullet in flying cheap, I was able to first make Gold Preferred and then followed up with Silver and collected close to 180,000 miles all for under $1500.

Those miles earned me 1 round trip business class ticket to Europe and 2 Economy class tickets to Europe – or roughly $7000 worth of airline travel!  While I did this on US Airways, my general guidelines could be used for just about any airline with a rewards program.

Look for Promotions

One of the first things I did before traveling was check for any current promotions.  At the time of my travels US Airways was running a promotion – Fly 7,500 miles or 10 segments for Silver or Fly 15,000 miles or 20 segments for Gold in 90 days and I signed up (It was a free option at the time but they still offer it, for a fee).  Seeing as I was going to fly at least twice that time for approximately 8000 miles I felt it was a no-brainer to signup.

I once rented 6 cars from a particular rental agency.  I only needed one but told the attendant to book them and return them.  He thought I was crazy (maybe I was?) but I was able to net 20k miles in the process.  I used a spreadsheet and would figure out if a particular promotion was worth the cost or not.  I value miles at 4~5 cents per mile and will spend money if I can get them for less then 3 cents a mile.  That particular time I was able to get miles for $0.009/mile!

Airlines often have various promotions – such as booking through a particular city etc that can boost your mileage count.  Sometimes you’ll be surprised that adding an extra stop doesn’t effect the price much (and you increase your chances of an oversold flight).

Purposely Book Oversold Flights

Oversold Flight

Booking oversold flights can save you serious money in the form of travel vouchers.

While it requires you to be flexible, booking flights that you know will be oversold can save you on future travel.  When a flight is oversold they will ask for volunteers and often provide a hefty voucher to go along with it.

For me, I would always book prime-time flights with a connection from DCA-CLT as I know that it will be full of consultants who aren’t as flexible as me.  While I sometimes paid a premium I would get more then it back in the form of flight vouchers – including the time I got one for $600 (double the price of the flight I had bought!).

Airlines will oversell flights on purpose.  It’s simple economics:  sell the really expensive seats when the flight is near or overfull and just offer people with cheaper seats a voucher for future travel.  The airline makes more revenue per flight and both customers are happy – one made his flight and the other one was fairly compensated.

Oversold Flight

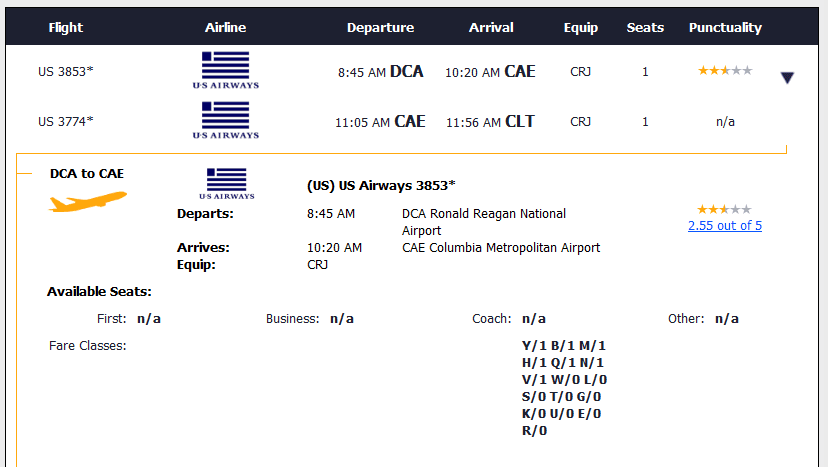
This upcoming flight is most likely going to be oversold.

Finding oversold flights is easy but takes a little legwork.  Use sites like FlightStats.com to find flights that might be oversold.  Do your homework – look at flights on the weekdays you want to travel and see which flights fill up.  You will find the best luck flying through a airlines hub.

For instance, the flight to the left is an upcoming flight for this Friday.  It’s a prime candidate for a oversold flight – Friday, Early, (business travelers just want to get home), through a hub, and out of a major business city.  Notice how few seats there are left?  The flight is already oversold – the airline will issue vouchers if those high dollar fares show up looking for their seats.  Look for similar flights during the times you want to fly look for a pattern and then use that knowledge to book that same flight far in advance before its sold out!

The nice thing about flying on a voucher is you get status and miles.  Vouchers were my number one source of keeping flights cheap.  A gate agent once joked with me because the system had issues giving me a voucher because I was already flying on one.

Add Connections

Adding Connections to a flight can significantly increase your earned mileage without adding much cost.  I sometimes purposely connected in Charlotte instead of flying direct just to gain the extra miles and segments.

While doing so also increases the chances of delays and cancellations (but hey it increases the chance of a oversold flight), for the leisure traveler it’s a great way to increase mileage without spending more money.

Sign Up for the Credit Card

I’m going to start with a warning:  Only do this if you are capable of fully paying your credit card every month.  If you are in capable of this it will negate any gain you get from the extra miles.

Sign up for whatever airline you use most and use that credit card to earn miles on every day purchases.  Most of these credit cards offer some sort of bonus for signing up – mine netted me 45k miles right away.  While the miles earned on purchases seem like a little, a lot adds up over time.  All told, I earned roughly 25k miles total just with every day purchases over the two years I had the card – or 70k total with the sign up bonus!  Again I stress – pay off your credit card in full if you do this.

For the more adventurous – people on FlyerTalk developed a guide for churning rewards cards.  Churning is canceling and resigning up for the same card to get the bonus again.  While I am not comfortable with the process (I didn’t want the hit to my credit report) – others seem to do it just fine.

Sign Up For Partners that Contribute Miles

Lots of airline partners will also contribute miles to your account.  Rental cars, hotels, even getting an insurance quote can get you miles.  Lots of Airlines have referral links for online sites (such as Apple) where any purchase you make will net you miles.

Look into and utilize these miles to your advantage.  You may be spending money that can net you miles and you don’t know it.  A lot of times Airlines target these partners for promotions netting you even bigger gains.  All told I earned over half of my 180k miles through promotions and partners.

So in summary this is how I earned 180,000 miles for under $1,500

  • Look for promotions and sign up for them
  • Look for and book flights you think will be oversold
  • Add connections if they don’t significantly break the bank
  • Sign up for the airlines credit card and use it (If you can pay it off each month)
  • Finally, leverage airline partners (rental cars, hotels etc) to earn even more miles

Hopefully you too will be able to repeat my success!

Posted in Travel | 2 Comments

Packing for International Travel

Packs on the Inca TrailPacking for international travel can be a little overwhelming.  What do you bring?  Will my charger need an adapter? I use this basic packing list as my basis for any trip I do overseas,  modifying for any special occasion (Winter, hiking etc).  Using my guide you should be prepared for your next international trip too!

Remember you can always do laundry while traveling so don’t go overboard on packing.  My general guideline is 4~5 “outfits” (IE Pants/Shirts combos).  Then, when I run out of clean underwear, I just find a washing machine and repeat.

Chances are you will pack too much on the first go-round so gather everything and ask yourself Do I really need this.  If your answer is anything but a certain Yes don’t take it!  Worst case is you buy it there – in reality a little adventure in itself!

What to Pack

While this list is aimed at a man any woman can use this as a general guide too.  You’ll be surprised how little you can get by with and what you can find in local pharmacies.  I will say, so I’ve heard, tampons can be hard to find in some South American countries (and possibly elsewhere too – although Europe/UK should be just fine) so be sure to pack those as needed.

  • Toiletries bag (all travel size stuff, you can always restock if you run out)
    • includes all the bathroom stuff, sunscreen, personal items, 1st aid/ medical, etc.
  • 5 pairs of underwear (I pack ExOfficio Give-N-Go Boxer Briefs – they can be washed in a sink in a pinch)
  • 5 pairs of socks
  • 1 pair of jeans
  • 2 pairs of hiking pants that zip-off into shorts
  • 1~2 t-shirts
  • 1~2 polo shirts (I primarily travel with ExOfficio snap shirts)
  • 1~2 button-up long sleeve (You can always roll up the sleeves)
  • 1 waterproof rain-shell type jacket with hood (While not cheap I have the Arc’teryx Beta SL jacket – it’s so packable!)
  • 2 pairs of shoes total (or 3 if you really need them, but only take 2 on the trek)
    • 1 pair of multi-use walking/hiking shoes (I like Trail Running shoes)
    • 1 pair of sandals (to get a break from your hiking/ walking shoes, also important to air your feet out each evening after a day of hiking)
  • Eyeglasses/ contact stuff if needed
  • Sunglasses, bandana and visor
  • Gadgets (to be kept to a minimum)
    • Compact digital camera (I cary a Fuji X100 but anything is fine). Would advise against bringing a bulky SLR.
    • iPhone (or something equivalent to make calls in emergency, enable you to check email, and make internet enabled phone calls for free – most hotels have Wi-Fi.  See using your smartphone abroad for more info.)
    • Chargers for everything, extra battery (charged) for camera  just in case
    • Power Converter plugs
      • UK, Australia, and EU all have different plug standards.  Look up what plug standard your country uses and buy one – they are cheap!
      •  For basic things like phones, laptops, and cameras you only need the plug adaptor and not the voltage convertor.
      • For other items check your label to see if it can operate on multiple voltages.
  • Water Bottle (or two) – I always carry a Vapur collapsible water bottle that’s come in handy too many times to list.  It literally folds into my pocket
  • Day Bag – I use a packable one from Barefoot.
  • Photocopies of your passport
  • Printed copies of your itinerary, as well as all important addresses and numbers you could possibly need (do not always depend on gadgets or internet!)
  • Stuff to read (books and magazines, to be thrown out after you finish them on the spot).
Posted in Travel | Tagged | Leave a comment